

Table of Contents
- What You'll Need Before You Start
- Step 1: Inspect Print Quality and Ink Adhesion
- Step 2: Verify Print Alignment and Placement Tolerances
- Step 3: Evaluate Fabric Quality and Garment Durability
- Step 4: Run a T-Shirt Print Durability Test
- Step 5: Preventing Fading on Funny Graphic Tees
- Common Printing Defects to Look For
- Step 6: Approve Your Proof and Inspect Bulk Orders
- Frequently Asked Questions
Last Updated: September 16, 2026
What You'll Need Before You Start
A quality check on custom printed apparel is a hands-on inspection that catches defects before they reach your group or event. A quality check on custom printed apparel is a hands-on inspection that catches defects before they reach your group or event. The difference between a shirt that survives fifty washes and one that cracks in three often comes down to a few checkpoints most buyers skip.
Before you start, gather these items:
- A well-lit table or flat surface (natural daylight works best)
- A tape measure for checking print placement
- A magnifying glass or phone camera zoom for close inspection
- Your approved design proof or mockup for reference
- A spray bottle of water for a quick adhesion test
Set aside 10-15 minutes per garment. For bulk orders, spot-check at least 10% of the run, and inspect every piece if the order is under 20 shirts.
American Apparel & Footwear Association guidance on textile quality standards
Step 1: Inspect Print Quality and Ink Adhesion
Ink adhesion is the single best predictor of how a printed shirt will hold up over time. Press your thumb firmly into the printed area and pull the fabric taut. The ink should flex with the fabric, not crack or lift away from the surface.
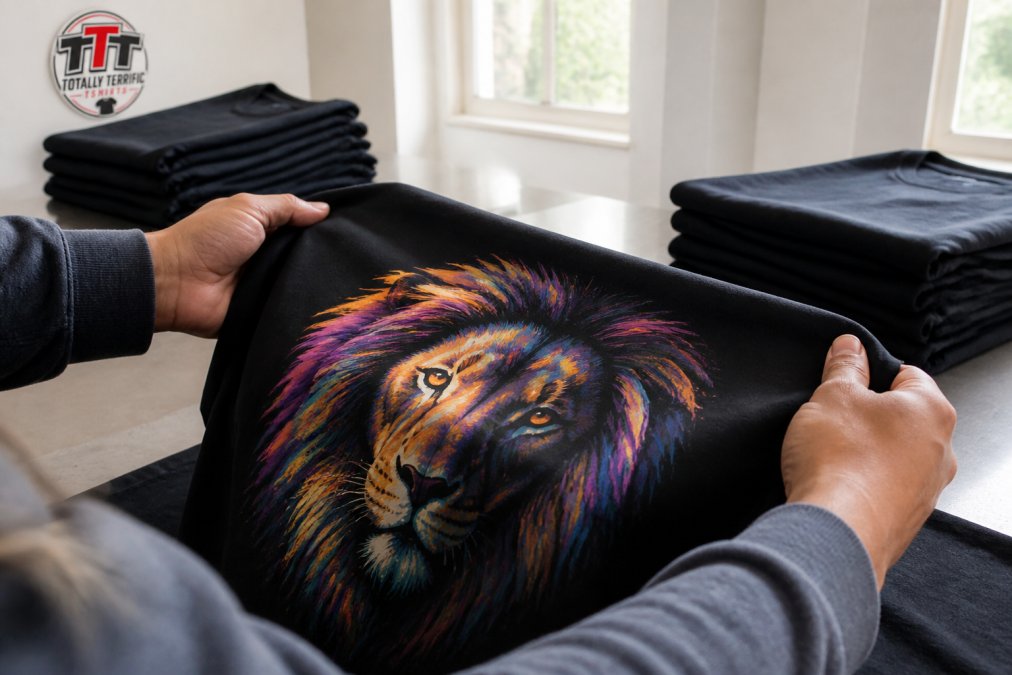
Run your fingernail lightly across the print edge. If ink flakes off or the fabric weave shows through in patches, the print wasn't cured properly, the most common defect in custom printed apparel, and almost always invisible until after the first wash.
Checking for Cracking, Peeling, and Fading
Hold the shirt up to a window or bright lamp and look across the print at a low angle. Cracking shows as fine white lines, peeling as lifted edges or bubbles, and fading as washed-out color compared to your proof. Check the full perimeter, edges and corners fail first.
How to Test Ink Adhesion at Home
Mist a small section of the print with water, then rub it firmly with a white cloth for 10 seconds. If color transfers to the cloth, the ink isn't fully cured. Let it dry and check for any change in texture or color depth.
Step 2: Verify Print Alignment and Placement Tolerances
Print alignment determines whether a shirt looks professionally finished or slightly off. Lay the shirt flat and measure from the collar seam to the top of the print, standard placement is 2 to 3 inches below the collar for a full-front design, centered within a quarter inch. Check that the design sits parallel to the shoulder seams; even a few degrees of rotation is noticeable on text-heavy designs.
Step 3: Evaluate Fabric Quality and Garment Durability
Fabric quality decides how the print ages as much as the ink does. Heavier fabrics hold prints better because the surface stretches less during wear, a substantial, dense hand feel usually signals a garment that keeps its shape. Tug gently along the shoulder and side seams; loose or skipped stitches mean the garment will pull apart before the print fails.
Material-Specific Quality Checks
Different fabrics behave differently, and your inspection should match the material. The biggest split is between cotton (usually screen printed) and polyester (usually sublimated or DTG printed). Each has its own failure modes, and checking them the same way is a mistake.
Matching the Check to the Material
The rule of thumb: on cotton, check the ink. On polyester, check the color. On blends and triblends, check both. A shirt that passes every check on cotton can fail on polyester for reasons unrelated to the printer's skill, knowing your material tells you where to look first.
Step 4: Run a T-Shirt Print Durability Test
A t-shirt print durability test tells you how the garment will perform after repeated washing, and you can run one at home before committing to a full order. Most guides stop at three washes, not enough. The defects that matter (edge lifting, color fade, cracking along fold lines) often don't show up until wash five or later. Here's how to run a test that actually predicts long-term performance.
The 10-Wash Protocol
Start with two identical sample shirts from the same run. Keep one unworn as your control. Wash the other inside out in cold water on a gentle cycle with mild detergent, then tumble dry on low. Repeat ten times, inspecting after washes 1, 3, 5, and 10, the threshold most quality teams use because it approximates several months of normal wear.
- Edge integrity: Run a fingernail along the print border. Lifting starts at the perimeter, not the center.
- Color depth: Hold both shirts side by side against a white wall. A shift of even one shade is a warning sign.
- Crack pattern: Look for fine white lines along fold lines, the shoulders, chest, and where the shirt creases in the dryer.
- Hand feel: A print that starts stiff and gets stiffer is a sign of over-curing or a low-quality ink base.
What Each Wash Reveals
| Wash Cycle | What You're Testing | Failure Signal |
|---|---|---|
| Wash 1 | Cure quality and initial adhesion | Flaking, color transfer to the cloth |
| Wash 3 | Ink flexibility | Cracking along fold lines |
| Wash 5 | Dye stability | Fading compared to control |
| Wash 10 | Long-term durability | Edge lifting, widespread cracking, dull color |
A well-cured print on a quality garment should show minimal change through wash five and only mild softening by wash ten. If it looks noticeably worn after one or two cycles, the whole run is at risk, and no amount of careful home care will save it.
Why This Matters More Than the Out-of-Box Look
A shirt can look perfect on the table and still fail by wash five. The out-of-box look only tells you the print was applied cleanly; the 10-wash test tells you whether the ink was cured properly, whether the fabric was pre-shrunk, and whether the garment will still look sharp when your group wears it to the reunion, the game, or the shift.
Step 5: Preventing Fading on Funny Graphic Tees
Preventing fading on funny graphic tees starts with how the shirt is printed and how it's cared for afterward. Direct-to-garment printing lays ink on the fabric surface, making bold colors and fine text vulnerable to fading if curing was rushed; screen printing pushes ink into the weave for more resistance. For buyers: wash inside out in cold water, avoid fabric softener (it breaks down the ink bond), and skip the dryer when you can.
Textile Exchange guidance on fiber and dye durability
Common Printing Defects to Look For
Most print defects fall into a handful of categories, and knowing them speeds up your inspection. Here's what to check for and how to spot each one:
| Defect | What It Looks Like | Likely Cause |
|---|---|---|
| Cracking | Fine white lines through the design | Under-cured ink |
| Peeling | Lifted edges, bubbles | Poor adhesion or low cure temp |
| Fading | Washed-out, uneven color | Dye migration or sun exposure |
| Misalignment | Off-center or rotated print | Placement error during setup |
| Pixelation | Blurry or jagged edges | Low-resolution artwork file |
| Ghosting | Faint double image | Screen or platen shift |
Step 6: Approve Your Proof and Inspect Bulk Orders
Proof approval is your last chance to catch problems before the full run is printed. Check spelling, color accuracy against your brand colors, and exact placement dimensions, and compare against your original vector artwork, not a screenshot, since screens display color differently than fabric.
Frequently Asked Questions
How do I test if a custom t-shirt print will fade?
Wash the shirt inside out in cold water and let it air dry. After three to five washes, compare it to a new one. Check for dulling colors, cracking, or peeling. A quality print on custom printed apparel should stay vibrant. If you see fading after a few washes, the ink or curing process was likely poor. Always follow care instructions to extend print life.
What are the signs of high-quality screen printing on apparel?
High-quality screen printing feels smooth, not thick or rubbery. The ink should stretch with the fabric without cracking. Colors are sharp and opaque, with no bleeding between shades. Edges are clean, and the print is centered. If you can peel the ink with your fingernail, it's not cured properly. Look for consistent coverage across the entire design.
Does the printing method affect the longevity of custom shirts?
Yes. Screen printing typically lasts longest on cotton, while direct-to-garment (DTG) works well for detailed designs on blends. Both can fade if not cured correctly. Embroidery is durable but adds texture. For custom printed apparel, ask about the method and expected wash life. Proper curing and quality inks matter more than the method alone.
How can I tell if a custom shirt design is durable?
Perform a stretch test: pull the fabric gently where it's printed. If the ink cracks or separates, it's not durable. Also check for a smooth, even finish. Wash the shirt a few times and inspect for fading or peeling. Durable prints on custom printed apparel handle repeated washing without losing color or shape. Always review the care label.